Hi there,
Today I want to speak about integrating Playwright in your GitHub action CI.
So don't waste time and let's start.
To start, you have to create a file called playwright.yml in this path .github/workflows.
The
.github/workflows' path is used to save the files for your GitHub Actions, and the name of the file is not important for GitHub because the value for it is inside of your files.
Let's start to copy and paste this code into the playwright.yml
name: Playwright Tests
on: [push]
These two info are used to give a name to the CI and to define what triggers this CI.
These are standard fields that you can find in every GitHub Action in the world.
In this case, the CI will trigger every push in the project.
Now it's time to add the first job to run your e2e tests in CI.
To do that, add this to your file.
jobs:
  test-e2e:
    timeout-minutes: 60
    runs-on: ubuntu-latest
    steps:
      - uses: actions/checkout@v3
      - uses: actions/setup-node@v3
        with:
          node-version: 16
      - name: Install dependencies
        run: npm ci
      - name: Install Playwright Browsers
        run: npx playwright install --with-deps
      - name: Run Playwright tests
        run: npx playwright test
      - uses: actions/upload-artifact@v3
        if: always()
        with:
          name: playwright-e2e-report
          path: playwright-report/
          retention-days: 30
Jobs are used in GitHub Action to run different stuff, like build, test, deploy etc. etc.
In this example, the test-e2e's job creates a list of steps to run the test in the CI.
But what this job does:
runs-onis used to indicate on which platform the job has to runactions/checkout@v3checkouts the codeactions/setup-node@v3setups the node version for the jobInstall dependenciesinstalls all the dependencies in thenode_modulesInstall Playwright Browsersinstalls the browsers for PlaywrightRun Playwright testsruns the e2e testsactions/upload-artifact@v3uploads the test's results in the GitHub Artifact
Ok, this is the job for the e2e tests; now it's time to add the job for the component tests.
To do that, copy and paste the following code
  test-ct:
    timeout-minutes: 60
    runs-on: ubuntu-latest
    steps:
      - uses: actions/checkout@v3
      - uses: actions/setup-node@v3
        with:
          node-version: 16
      - name: Install dependencies
        run: npm ci
      - name: Install Playwright Browsers
        run: npx playwright install --with-deps
      - name: Run Playwright tests
        run: npx playwright test -c playwright-ct.config.ts
      - uses: actions/upload-artifact@v3
        if: always()
        with:
          name: playwright-ct-report
          path: playwright-report/
          retention-days: 30
As you can see, it's similar to the previous job but has different configurations, so I don't dive into it.
Now with these two jobs, you have a CI ready to run.
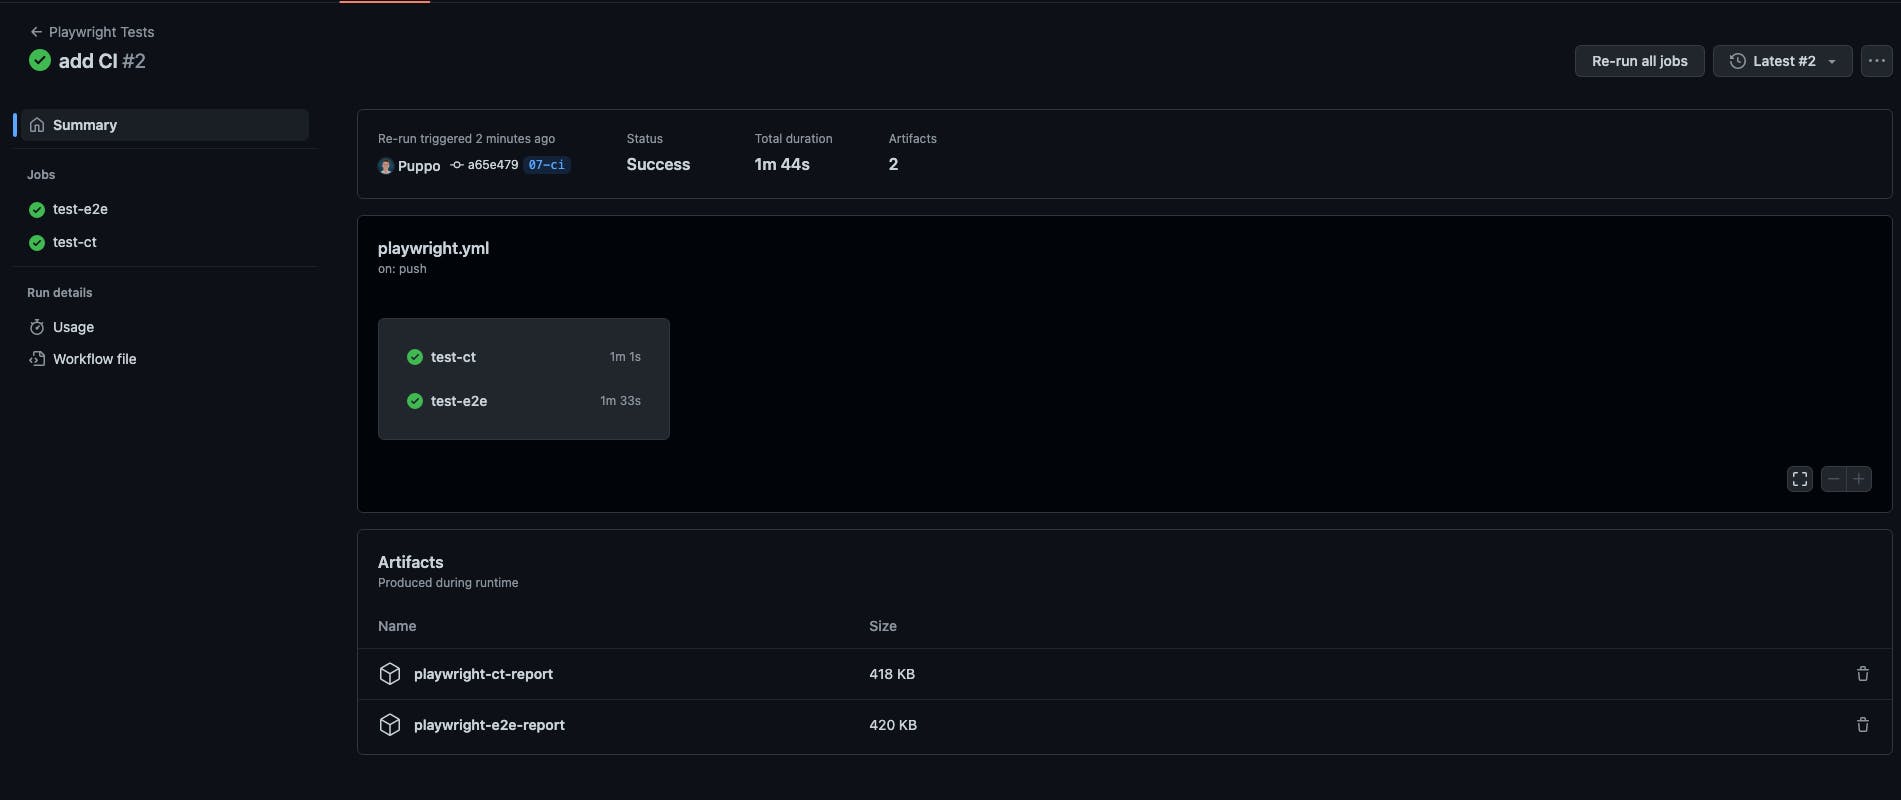
To do that, git add + git commit + git push, and go into your online GitHub repository. In the tab Actions, you can find your CI in action, and If you click on it, you can see the two jobs running. (It's important to understand that these two jobs run in parallel, you can find more info about job execution here)

When the CI is ended, you are sure that your tests are ok as expected. And the result will be like this.

Perfect, now you have your first GitHub action configured to run your tests with Playwright.
Good, that's all folk, I think you have all the info to integrate Playwright in your CI without any problem.
Thank you and see you soon.
Bye Bye 👋
The code of this post is available here.

