
Hey Folks,
In this post, you’ll learn how to debug and check whatever happens in your React Query application. It’s normal when you begin to learn or use a tool; check the tools around it to understand the developer experience so you can decide whether to continue with it. The React query team knows that and has decided to build a tool to help the developer that wants to work with React Query.
This tool is called react-query-devtools and you can install it in a simple step.
Open your terminal and type
$ npm i @tanstack/react-query-devtools
Now, in your project, you can use it and get all the info required to debug your application.
This tool is simple to use. In your application, you must import it and render it where you render the ReactQueryProvider.
import { QueryClientProvider } from '@tanstack/react-query';
import { ReactQueryDevtools } from '@tanstack/react-query-devtools';
import React from "react";
import { queryClient } from './react-query/client';
import Router from './Router';

function App() {
  return (
    <React.StrictMode>
      <QueryClientProvider client={queryClient}>
        ...
        <ReactQueryDevtools />
      </QueryClientProvider>
    </React.StrictMode>
  );
}
export default App;
Easy peasy, no?
With ReactQueryDevtools, you don’t have to pay attention to the environment to render or not the component because it provides it by default. It renders the component only if the condition process.env.NODE_ENV === 'development' is true.
You can customize the component or force its render also in production mode if you want. To find out more about these topics, you can check the documentation.
The benefit of using this component in your application is that it allows seeing what happens in ReactQuery at runtime. You can check the data saved in the state, how many application parts use the different queries, etc. You can also reset the state or remove part of it to re-fetch the data.
Yeap, it exposes many good features to debug and check your React Query application, and it is a good tool for every developer that works with React Query. Here you can find an example of ReactQueryDevtool at work
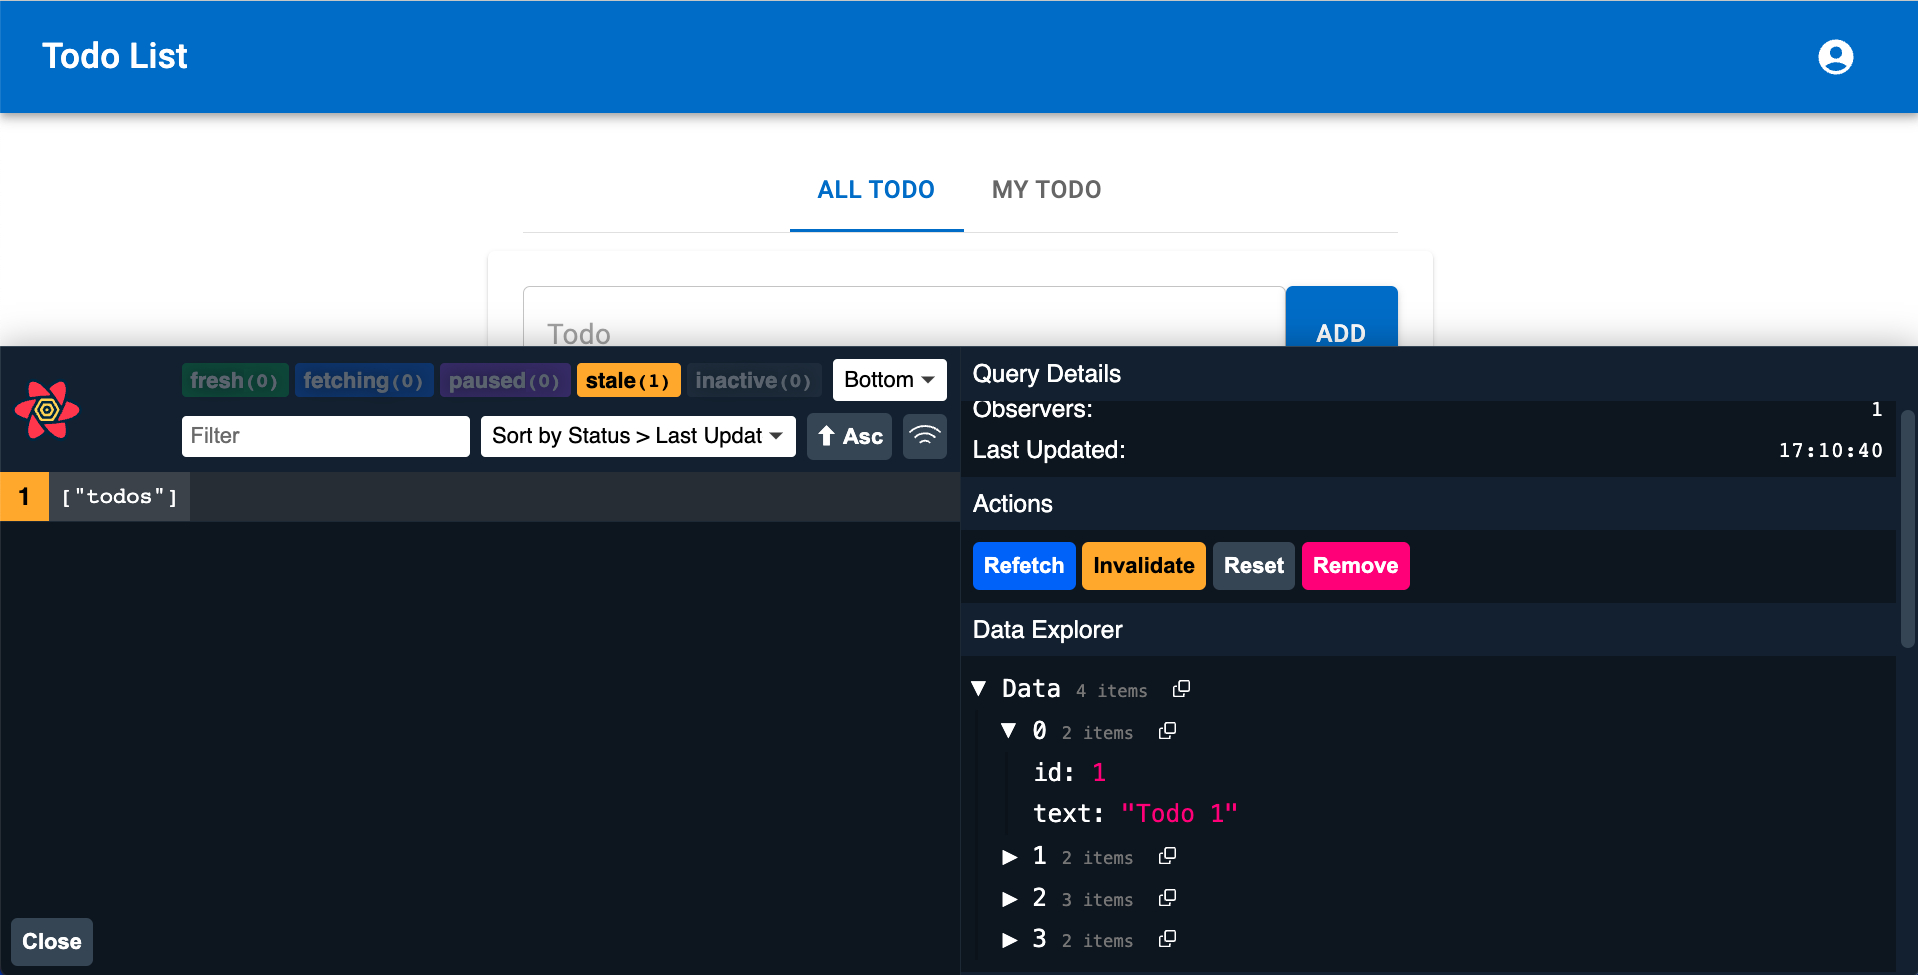
If you want to find out more, watch my Youtube video about React Query Devtool to see it in action.
🎬 Watch / View Embedded Resource: https://youtu.be/qXycRUetOX4
Ok, that’s all! I think you have an idea of what React Query Devtools is and how you can integrate it into your application!
I hope you enjoyed this content!
See you soon folks Bye Bye 👋
p.s. you can find the code of the video in the GitHub repository
Photo by Rahul Mishra on Unsplash
🎬 Watch / View Embedded Resource: https://dev.to/puppo